Ever dreamed of strumming a guitar you built with your own hands? You’re not alone. In fact, the DIY musical instrument market has grown by 15% annually since 2020, with acoustic guitar kits leading the charge. Today, we’re diving into the world of DIY acoustic guitar kits, where craftsmanship meets melody. From selecting the perfect kit to fine-tuning your creation, we’ll cover everything you need to know to embark on this rewarding musical journey.
What’s in the Box? Unboxing Your DIY Acoustic Guitar Kit
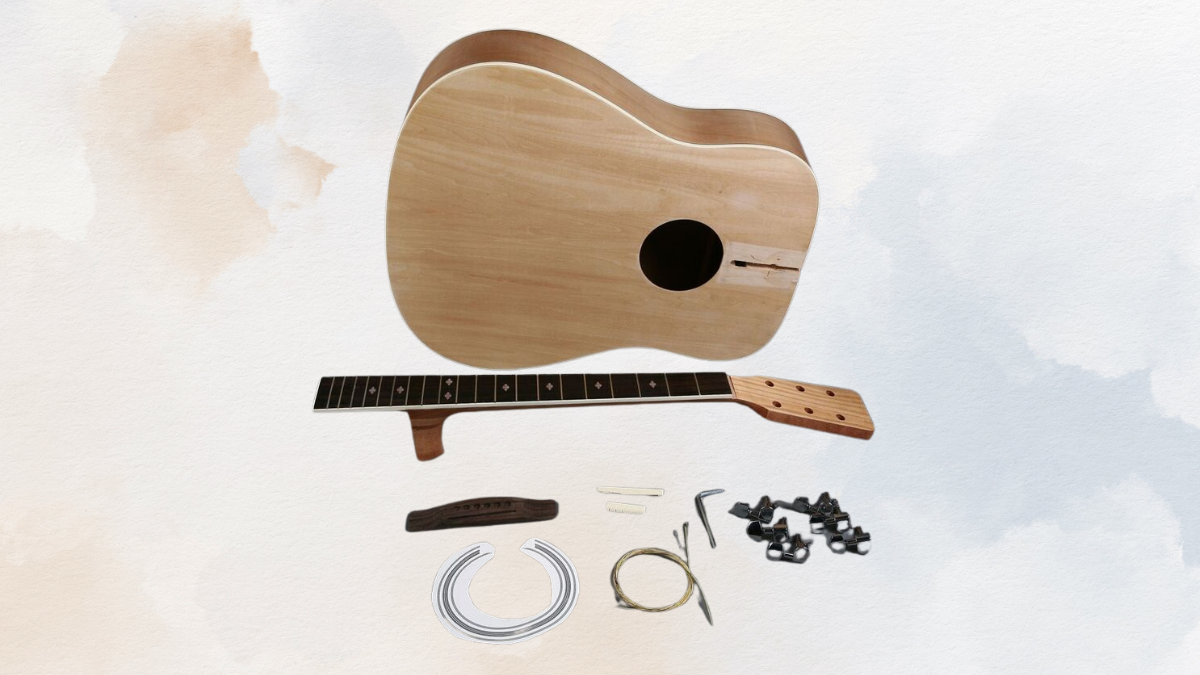
Components Overview
The DIY Acoustic Guitar Kit comes with a spruce top and agathis back and sides, providing a solid foundation for your instrument. These carefully selected woods contribute to the guitar’s overall tone and resonance.
Pre-assembled Dreadnought Body
One of the key features of this kit is the pre-assembled dreadnought body. This popular body shape is known for its robust sound, making it a favorite among acoustic guitar enthusiasts. The dreadnought design offers a full, rich tone with excellent projection.
Black Walnut Fingerboard
To simplify the assembly process, the kit includes a pre-shaped black walnut fingerboard. This component is particularly helpful for beginners, as it eliminates the need for complex shaping and allows for easier installation.
Hardware and Accessories
The kit comes complete with all necessary hardware and accessories, ensuring you have everything needed to construct a fully functional acoustic guitar.
Getting Started: Tools and Workspace Preparation
Essential Tools for Guitar Assembly
Before diving into the assembly process, gather all the required tools. These may include screwdrivers, pliers, sandpaper, and specialized luthier tools for precise adjustments.
Setting Up Your Workspace
Create a clean, well-lit area with ample space to work on your guitar. A sturdy workbench or table is ideal for this project.
Safety Precautions and Best Practices
Always prioritize safety when working with tools and materials. Wear protective eyewear and follow proper handling techniques for all components and tools.
Step-by-Step Assembly Guide
Attaching the Neck to the Body
Begin by carefully aligning and attaching the neck to the pre-assembled body. This step is crucial for proper intonation and playability.
Installing the Truss Rod
The kit features a 2-way adjustable truss rod. Install this component in the neck, following the provided instructions closely. This rod allows for future adjustments to maintain optimal neck tension.
Fretboard Installation and Leveling
Next, install the pre-shaped black walnut fingerboard. Ensure it’s properly aligned and level across the neck.
Stringing and Initial Setup
Once the major components are in place, string your guitar and perform an initial setup. This includes adjusting string height and checking for any immediate issues.
Customization Options: Making It Your Own
Finish Options
Consider various finish options for your guitar. You can leave it natural, apply a stain, or paint it to achieve your desired look.
Adding Personal Touches
Explore ways to add personal flair to your instrument, such as custom inlays or decorative elements that reflect your style.
Upgrading Components
For enhanced sound quality, you might consider upgrading certain components as you become more familiar with your instrument.
Fine-Tuning Your Creation
Using the Adjustable Truss Rod
Take advantage of the 2-way adjustable truss rod to fine-tune your guitar’s playability. This feature allows you to adjust the neck’s curvature for optimal string action.
Setting Up Action and Intonation
Carefully adjust the string action and intonation to ensure comfortable playing and accurate tuning across the fretboard.
Breaking in New Strings
Allow time for your new strings to stretch and settle. This process, known as breaking in, will help stabilize tuning and improve overall sound quality.
Troubleshooting Common Issues
Dealing with Fret Buzz
If you encounter fret buzz, check your string height and neck relief. Minor adjustments can often resolve this common issue.
Addressing Tuning Stability Problems
Should you experience tuning stability issues, inspect the nut, bridge, and tuning machines. Proper lubrication and adjustment of these components can significantly improve tuning stability.
Fixing Bridge and Saddle Alignment
Ensure proper alignment of the bridge and saddle to maintain accurate intonation across the fretboard.
Maintaining Your Handcrafted Acoustic Guitar
Proper Storage and Humidity Control
Store your guitar in a controlled environment to prevent damage from temperature and humidity fluctuations. Consider using a humidifier in dry climates.
Regular Cleaning and Polishing Techniques
Develop a routine for cleaning and polishing your guitar to maintain its appearance and protect the wood finish.
When to Seek Professional Help
While many maintenance tasks can be performed at home, some issues may require the expertise of a professional luthier. Don’t hesitate to seek help for complex repairs or adjustments.
The Sound of Success
As you strum the first chord on your handcrafted acoustic guitar, you’ll experience a sense of accomplishment like no other. Building your own instrument not only provides a deeper understanding of guitar construction but also creates a personal connection to your music. Whether you’re a beginner looking to learn about guitar anatomy or an experienced player seeking a new challenge, a DIY acoustic guitar kit offers an enriching experience. So, pick up that kit, embrace the journey, and let your creativity sing through every note you play on your very own handmade guitar.
Leave a Reply